Cake Mix Chocolate Chip Cookie Bars Recipe
Introduction
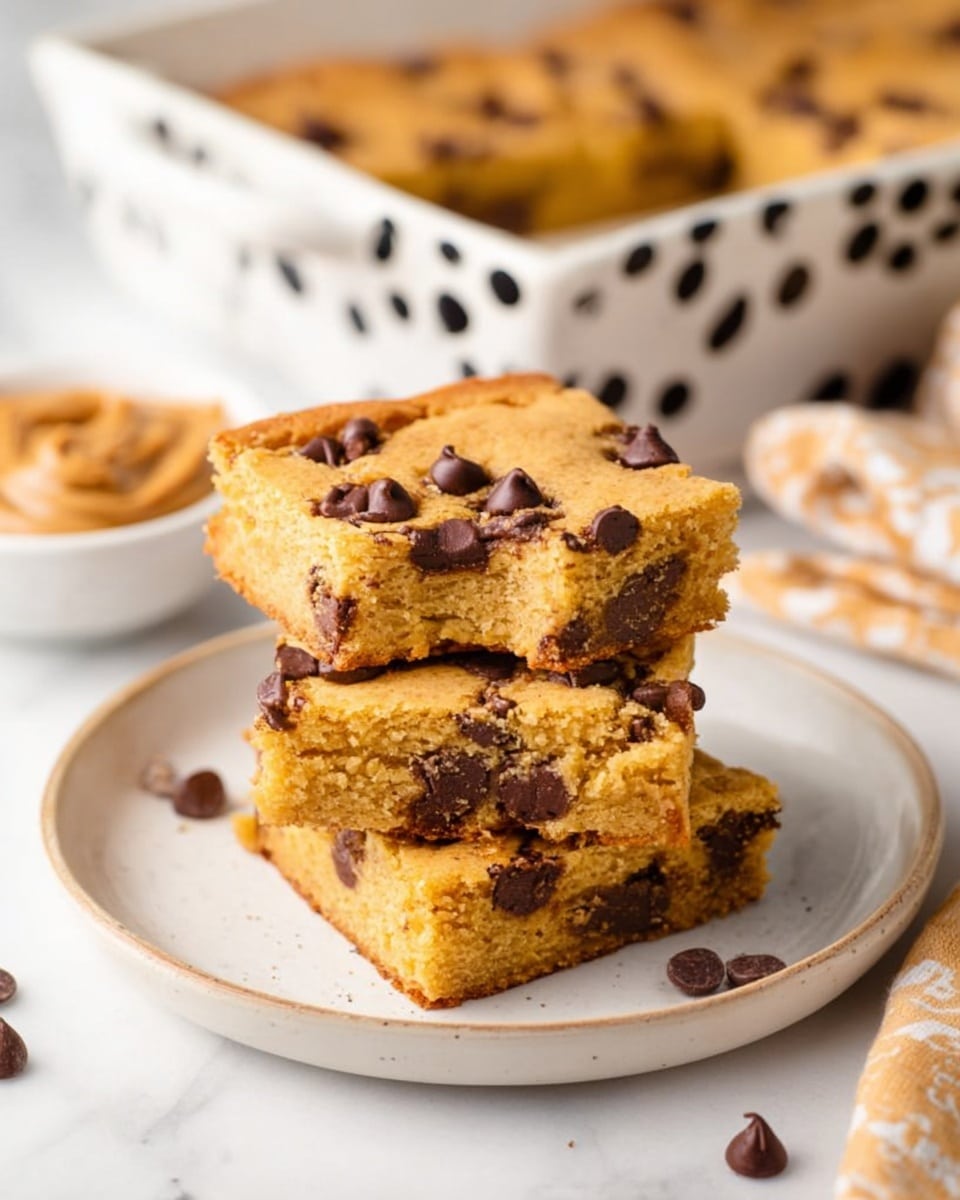
These Cake Mix Chocolate Chip Cookie Bars are an easy, crowd-pleasing treat that combines the simplicity of cake mix with the classic flavor of chocolate chip cookies. Perfect for a quick dessert or snack, they come together quickly and bake into soft, gooey bars.
Ingredients
- 1 box Yellow Cake Mix (13.25 ounces)
- 2 Large Eggs
- 1/2 cup Vegetable Oil
- 1/3 cup Water
- 3/4 cup Chocolate Chips + extra for topping
Instructions
- Step 1: Preheat the oven to 350 degrees Fahrenheit. Spray a 9×13 baking pan with nonstick cooking spray and set aside.
- Step 2: In a large mixing bowl, combine the cake mix, eggs, vegetable oil, and water. Mix until the batter is smooth and free of lumps.
- Step 3: Fold in 3/4 cup of chocolate chips gently into the batter.
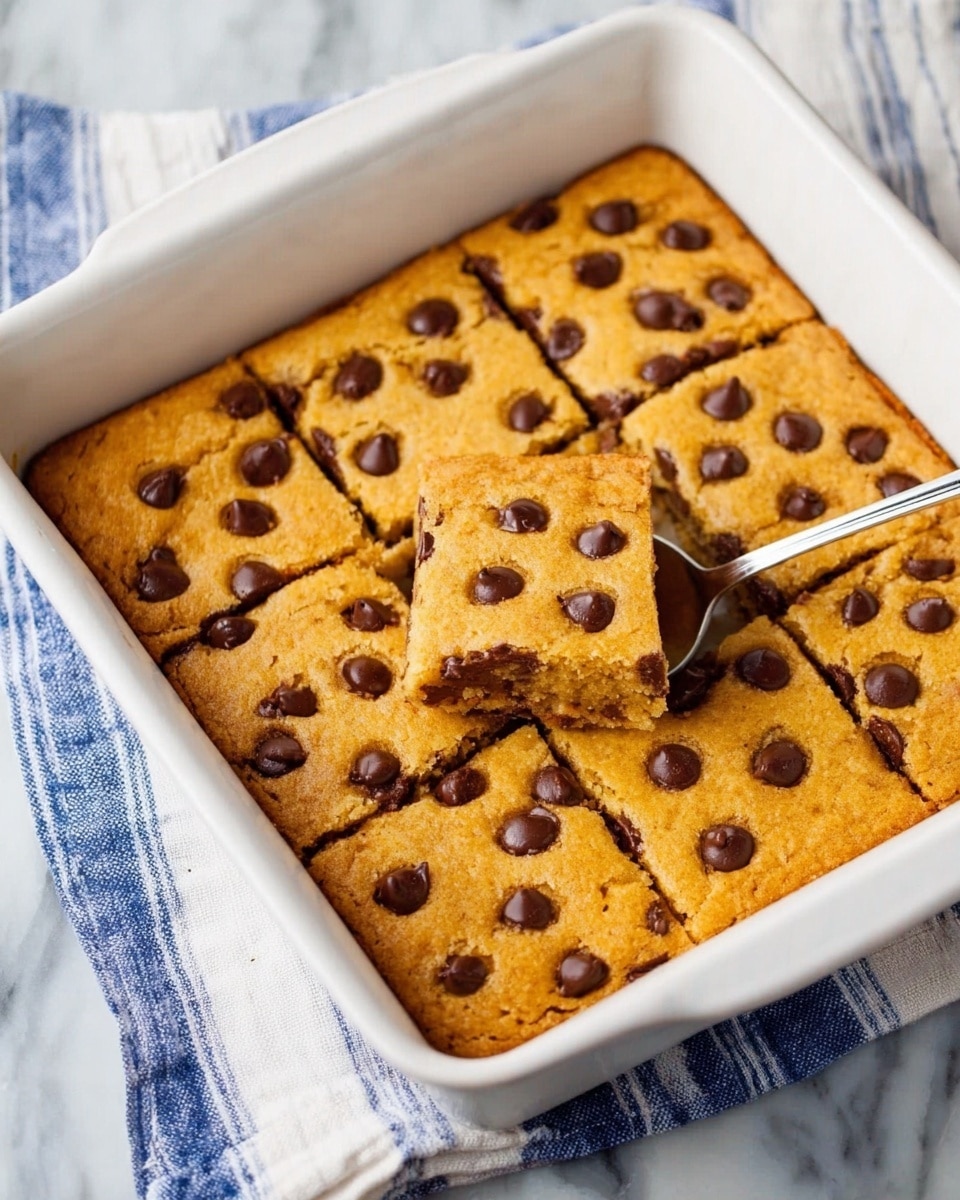
- Step 4: Pour the batter into the prepared pan and spread it evenly with a spatula.
- Step 5: Sprinkle a few extra chocolate chips over the top for a lovely finish.
- Step 6: Bake for 24 minutes, or until a toothpick inserted in the center comes out just barely gooey. Avoid overbaking as the bars will continue to set once removed from the oven.
- Step 7: Remove the pan from the oven and allow the bars to rest for 20-30 minutes to set properly. This helps prevent them from falling apart when sliced.
- Step 8: Once cool, slice into bars, serve, and enjoy!
Tips & Variations
- For extra flavor, try stirring in a teaspoon of vanilla extract before folding in the chocolate chips.
- Swap chocolate chips for white chocolate, peanut butter chips, or a mix for a different twist.
- If you prefer a crunchier texture, bake a minute or two longer but watch carefully to prevent drying out.
- Line the baking pan with parchment paper for easier removal and cleaner edges.
Storage
Store the cookie bars in an airtight container at room temperature for up to 3 days. For longer storage, you can refrigerate them for up to a week or freeze for up to 3 months. Warm bars slightly in the microwave before serving to soften and enhance the gooey texture.
How to Serve
Serve this delicious recipe with your favorite sides.
FAQs
Can I use a different type of cake mix?
Yes, you can use any yellow or even vanilla cake mix as a base. Chocolate or other flavored cake mixes will change the flavor but can also yield delicious results.
What if I don’t have vegetable oil?
You can substitute vegetable oil with an equal amount of melted butter or a neutral oil like canola. This may slightly affect the texture, making the bars richer or more tender.
PrintCake Mix Chocolate Chip Cookie Bars Recipe

Delicious and easy-to-make Cake Mix Chocolate Chip Cookie Bars that combine the convenience of cake mix with the classic taste of chocolate chip cookies. These bars are soft, chewy, and perfect for satisfying any sweet tooth with minimal effort.
- Prep Time: 10 minutes
- Cook Time: 24 minutes
- Total Time: 34 minutes
- Yield: 12 servings 1x
- Category: Dessert
- Method: Baking
- Cuisine: American
Ingredients
Dry Ingredients
- 1 box Yellow Cake Mix (13.25 ounces)
Wet Ingredients
- 2 Large Eggs
- 1/2 cup Vegetable Oil
- 1/3 cup Water
Add-ins
- 3/4 cup Chocolate Chips
- Extra Chocolate Chips for topping
Instructions
- Preheat Oven: Preheat the oven to 350 degrees Fahrenheit. Lightly spray a 9×13 inch baking pan with nonstick cooking spray and set it aside to prepare for the batter.
- Mix Ingredients: In a large mixing bowl, combine the cake mix, eggs, vegetable oil, and water. Stir thoroughly until the batter is smooth and free of lumps, ensuring an even consistency.
- Add Chocolate Chips: Fold in 3/4 cup of chocolate chips gently into the batter to spread the chocolate flavor throughout the bars.
- Pour Batter: Pour the batter into the prepared baking pan, smoothing it evenly to ensure uniform thickness for even baking.
- Top with Chocolate Chips: Sprinkle extra chocolate chips over the surface of the batter for added texture and chocolate bursts on top.
- Bake: Bake in the preheated oven for 24 minutes, or until a toothpick inserted in the center comes out just barely gooey. This ensures the bars stay soft and chewy rather than overbaked.
- Cool and Set: Remove the pan from the oven and let the bars rest for 20-30 minutes to cool and firm up. This step is crucial as slicing too early can cause the bars to crumble.
- Slice and Serve: Once the bars have cooled and set, slice into squares, serve, and enjoy the delicious cookie bars.
Notes
- Do not overbake; the bars should be slightly gooey in the center to maintain softness.
- Allow the bars to cool completely before slicing to prevent crumbling.
- You can substitute semi-sweet chocolate chips with dark or milk chocolate chips according to preference.
- Spraying the pan ensures easy removal of bars after baking.
- For a nutty twist, consider adding chopped nuts to the batter along with chocolate chips.
Keywords: Cake Mix Cookie Bars, Chocolate Chip Bars, Easy Dessert Bars, Quick Cookie Bars, Baked Cookie Bars