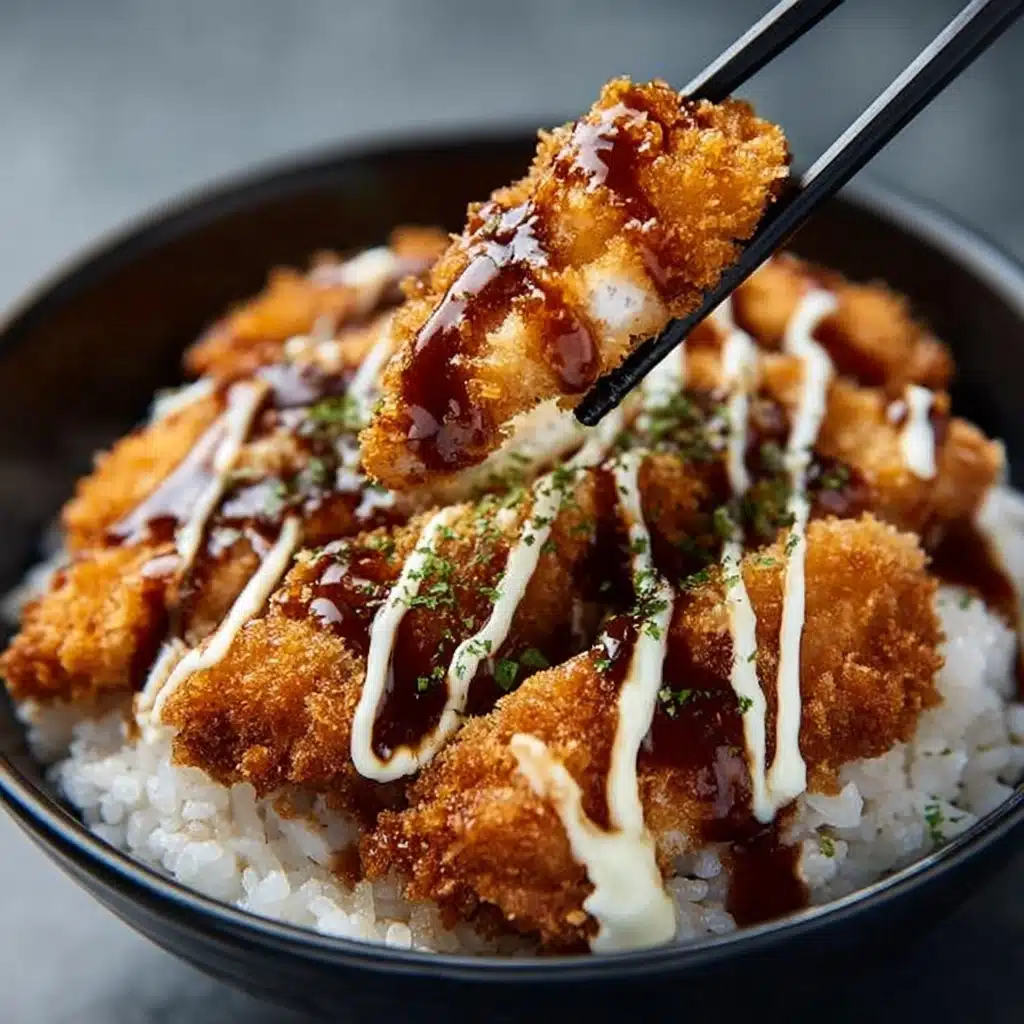
Japanese Katsu Bowls: A Delicious Guide to Making Authentic Katsu at Home
If you’ve ever craved a crispy, golden-brown Japanese katsu that is juicy on the inside and bursting with flavor, you’re in for a treat. This Japanese Katsu Bowls: A Delicious Guide to Making Authentic Katsu at Homeuide to Making Authentic Katsu at Home is your ticket to mastering a beloved Japanese comfort food favorite that’s surprisingly simple to create but impressively delicious. From perfectly cooked short-grain rice to the crunch of panko-coated chicken or pork, each step builds toward a dish that’s as satisfying as it is beautiful. Whether you’re serving it for a casual dinner or a special meal, this recipe will bring the irresistible taste of authentic katsu straight to your kitchen.

Ingredients You’ll Need
Gathering the right ingredients is the first step to achieving that classic katsu experience. Each element plays a crucial role in texture, flavor, or presentation, making the recipe approachable yet thoughtfully balanced.
- Boneless chicken breasts (or pork loin): Choose fresh cuts for tender, juicy meat that crisps perfectly when fried.
- Salt and pepper: Simple seasoning that enhances the meat’s natural flavor without overpowering it.
- All-purpose flour: Creates the initial layer that helps the egg and breadcrumbs stick for that signature crunch.
- Large eggs: Work as a glue for the breadcrumbs and add richness to the crust.
- Panko breadcrumbs: These Japanese-style breadcrumbs deliver that unmistakable light, airy crispiness essential to authentic katsu.
- Vegetable oil: Perfect for frying, it has a neutral flavor and high smoke point to cook the meat evenly.
- Japanese short-grain rice: The sticky texture of this rice balances the crunchy katsu beautifully.
- Rice vinegar: Adds subtle tang and shine to the rice, making every bite delightful.
- Sugar and salt: These seasonings round out the rice’s flavor.
- Tonkatsu sauce: The soul of katsu, this thick, tangy, and sweet sauce perfectly complements the crispy cutlet. You can make it or use a store-bought version.
- Soy sauce, Worcestershire sauce, ketchup: Mixed together, they create a layered complexity in the tonkatsu sauce.
- Shredded cabbage: Adds freshness and crunch to balance the richness of the fried cutlet.
- Green onions: Provide a bright, oniony note that livens up every bite.
- Sesame seeds: These little seeds add a subtle nutty flavor and attractively finish the dish.
- Pickled ginger (optional): Offers a zesty contrast to cleanse the palate between bites.
How to Make Japanese Katsu Bowls: A Delicious Guide to Making Authentic Katsu at Home
Step 1: Prepare the Rice
The foundation of any true katsu bowl is the perfectly cooked rice. Start by rinsing the Japanese short-grain rice under cold water until the water runs completely clear—this step removes excess starch and prevents the rice from becoming gummy. After rinsing, soak the rice in water for 30 minutes to ensure even cooking. Once soaked, cook the rice by bringing it to a boil, then simmering it covered for 15 minutes without lifting the lid. Let it rest off the heat for another 10 minutes, covered. To finish, fold in a gentle mixture of rice vinegar, sugar, and salt to add that subtle tang and glossiness that is so characteristic of Japanese rice. This step ensures your rice is fluffy, flavorful, and sticky enough to hold with chopsticks!
Step 2: Prepare the Chicken or Pork Cutlets
Next, use a meat mallet or the bottom of a heavy pan to pound the chicken breasts or pork loin to an even thickness of about half an inch. This guarantees uniform cooking and juicy results. Season both sides lightly with salt and pepper. Setting up a breading station is key for getting that perfectly crispy crust. Lay out three shallow dishes: one with flour, one with beaten eggs, and one with panko breadcrumbs. Dredge each cutlet first in the flour, shaking off any excess, then dip fully into the eggs, and finally coat evenly with the crunchy panko. Don’t rush this step because an even coating means that unbeatable crunch you’re aiming for.
Step 3: Fry the Katsu
Heat a generous amount of vegetable oil in a skillet over medium heat—you need enough oil to cover about half of the cutlet’s thickness. Once shimmering but not smoking, carefully place the breaded cutlets in the pan. Cook them for 4 to 5 minutes on each side until they develop a gorgeous golden-brown crust and reach an internal temperature of 165°F for chicken or until pork is cooked through. Drain the cooked katsu on paper towels to remove excess oil, then let them rest for a few minutes before slicing. This resting period locks in the juices and makes slicing cleaner and easier.
Step 4: Prepare the Tonkatsu Sauce
This recipe’s special sauce is a delightful blend of tonkatsu sauce, soy sauce, Worcestershire sauce, and ketchup. Whisk these ingredients together until smooth, balancing sweet, savory, and tangy notes to pair perfectly with the fried cutlet. This mixture is what elevates the dish from simple fried chicken to an authentic Japanese classic bursting with flavor.
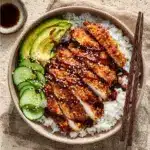
Step 5: Assemble Your Katsu Bowl
Now the fun part! Spoon a generous bed of the seasoned Japanese rice onto your plate. Arrange the sliced katsu neatly on top, then pile on shredded cabbage for crunch and freshness. Scatter sliced green onions and a sprinkle of sesame seeds over the dish. Drizzle the homemade or store-bought tonkatsu sauce over the cutlets, and if you love that extra zing, add a few pieces of pickled ginger on the side. This final presentation is not only visually stunning but invites you to dive into textures and flavors that harmonize beautifully.
How to Serve Japanese Katsu Bowls: A Delicious Guide to Making Authentic Katsu at Home
Garnishes
To truly serve authentic katsu with flair, garnishes play a starring role. Sesame seeds sprinkle subtle nuttiness and add visual interest, while thin slices of green onion bring a fresh pop of vibrant color and mild pungency. Pickled ginger is optional, but it’s wonderful for cutting through the richness with its tangy, slightly sweet bite.
Side Dishes
Traditionally, katsu bowls are best accompanied by simple, refreshing sides to balance the hearty fried cutlet. A crisp cabbage salad dressed lightly with a citrusy vinaigrette or a tangy miso soup adds warmth and contrasts beautifully. You might also consider a small bowl of steamed edamame or pickled vegetables to add variety and keep the meal balanced.
Creative Ways to Present
Feeling adventurous? Try serving your katsu bowl in a layered bento box, separating rice, cutlets, and sides to maintain distinct textures. Another fun twist is onigiri-style, wrapping rice and sliced katsu in nori seaweed for a handheld delight. For parties, skewer bite-sized katsu pieces with cherry tomatoes and green onions for a playful appetizer that keeps the Guide to Making Authentic Katsu at Home spirit alive in mini form.
Make Ahead and Storage
Storing Leftovers
Leftover katsu can be stored in an airtight container in the refrigerator for up to two days. To keep the breading as crispy as possible, try placing a paper towel inside the container to absorb moisture. Keep the tonkatsu sauce separate to prevent the crust from becoming soggy when reheated.
Freezing
If you want to enjoy katsu later, it freezes well. Wrap individual cutlets tightly in plastic wrap and store in a freezer-safe bag for up to one month. When ready to eat, thaw in the refrigerator overnight before reheating to maintain optimal texture and flavor.
Reheating
To reheat, avoid the microwave if you want to preserve crispiness. Instead, warm the cutlets in a 350°F oven on a wire rack set over a baking sheet for about 10-15 minutes. This method crisps the breading back up while ensuring the meat inside stays juicy. Reheat rice gently in the microwave or steamed for best results.
FAQs
Can I use pork instead of chicken for this recipe?
Absolutely! Pork loin is a traditional choice for katsu and works wonderfully in this recipe. Just be sure to cook it thoroughly and adjust cooking times slightly if your pork cutlets are thicker than chicken breasts.
What is the difference between panko and regular breadcrumbs?
Panko breadcrumbs are coarser and flakier than regular breadcrumbs, which gives katsu its light and extra crispy texture. Using panko is key to achieving that authentic crunch that regular breadcrumbs just can’t replicate.
Is tonkatsu sauce hard to make at home?
Not at all! Tonkatsu sauce is simply a blend of tangy, sweet, and savory ingredients like soy sauce, Worcestershire sauce, ketchup, and a bit of sugar. Mixing these together creates a delicious sauce that complements the fried cutlet perfectly, and it’s much cheaper and fresher than store-bought versions.
Can I prepare the katsu ahead of time and fry later?
Yes, you can bread the cutlets in advance and keep them refrigerated for up to a day before frying. Just make sure they are well-wrapped to avoid drying out. Frying them right before serving ensures the best texture and flavor.
What side dishes go best with katsu bowls?
Cabbage slaw, pickled vegetables, miso soup, and steamed rice are classic companions. You can also serve simple steamed greens or a refreshing cucumber salad to add balance to the meal’s rich flavors.
Final Thoughts
Embracing this Guide to Making Authentic Katsu at Home will open up a delightful world of Japanese home cooking that’s crisp, flavorful, and incredibly satisfying. Whether you’re making it for a weeknight dinner or impressing guests, this recipe’s blend of crunchy texture and savory sauce is sure to become a new favorite. So grab your apron, gather those simple ingredients, and dive into a culinary adventure that promises delicious results every time!
PrintJapanese Katsu Bowls: A Delicious Guide to Making Authentic Katsu at Home
A flavorful and crispy Japanese Katsu Bowl recipe featuring breaded and fried chicken served over seasoned Japanese short-grain rice with shredded cabbage, scallions, and a savory homemade tonkatsu sauce. This guide helps you create authentic katsu at home with simple ingredients and easy-to-follow steps, offering a classic Japanese comfort dish that’s perfect for weeknight dinners or gatherings.
- Prep Time: 35 minutes
- Cook Time: 25 minutes
- Total Time: 60 minutes
- Yield: 2 servings 1x
- Category: Main Course
- Method: Frying, Simmering
- Cuisine: Japanese
- Diet: Low Fat
Ingredients
Protein
- 2 boneless chicken breasts (or pork loin, if preferred)
- Salt and pepper, to taste
- 1 cup all-purpose flour
- 2 large eggs
- 1 cup panko breadcrumbs
- Vegetable oil, for frying
Rice
- 2 cups Japanese short-grain rice
- 2 ½ cups water
- 1 tablespoon rice vinegar
- 1 tablespoon sugar
- ½ teaspoon salt
Sauce
- ¼ cup tonkatsu sauce (or store-bought if preferred)
- 1 tablespoon soy sauce
- 1 teaspoon Worcestershire sauce
- 1 teaspoon ketchup
Garnishes
- 1 cup shredded cabbage
- 2 green onions, sliced
- Sesame seeds, for garnish
- Pickled ginger (optional)
Instructions
- Prepare the rice: Rinse the rice under cold water until the water runs clear to remove excess starch, ensuring fluffier cooked rice.
- Soak the rice: Transfer the rinsed rice to a saucepan, add 2 ½ cups water, and let it soak for 30 minutes to improve texture.
- Cook the rice: Cover the pan and bring the rice to a boil, then reduce heat to low and simmer for 15 minutes without lifting the lid, allowing even cooking.
- Let rice rest: Turn off the heat and let the rice sit, covered, for another 10 minutes to finish steaming.
- Season the rice: Mix rice vinegar, sugar, and salt until dissolved, then gently fold into the cooked rice to add a subtle tangy flavor typical of Japanese rice bowls.
- Prepare the chicken: Pound the chicken breasts to an even thickness of about ½ inch for uniform cooking, then season with salt and pepper on both sides.
- Set up breading station: Place flour in one dish, beaten eggs in another, and panko breadcrumbs in a third dish for the breading process.
- Bread the chicken: Dredge each chicken breast in flour, shake off excess, dip into the beaten eggs, and coat thoroughly with panko breadcrumbs.
- Fry the chicken: Heat vegetable oil in a skillet over medium heat and fry the breaded chicken for 4-5 minutes on each side until golden brown and fully cooked inside (internal temperature 165°F/74°C).
- Drain and rest: Place cooked chicken on paper towels to drain excess oil and let it rest for a few minutes before slicing to retain juices.
- Make the sauce: In a small bowl, combine tonkatsu sauce, soy sauce, Worcestershire sauce, and ketchup. Mix well to create a tangy and savory topping for the katsu.
- Assemble the bowls: Serve the seasoned rice on a plate or bowl, top with sliced katsu, shredded cabbage, sliced green onions, and sprinkle with sesame seeds. Drizzle generously with the prepared sauce and garnish with pickled ginger if using.
Notes
- You can substitute chicken breasts with pork loin for a more traditional tonkatsu.
- Make sure the oil temperature is medium-hot to ensure a crispy crust without burning.
- Use Japanese short-grain rice for the best texture and authenticity.
- Pickled ginger adds a refreshing contrast but is optional.
- Leftover katsu can be enjoyed cold or reheated in the oven for crispiness.
Nutrition
- Serving Size: 1 bowl (approximately 350g)
- Calories: 620
- Sugar: 7g
- Sodium: 850mg
- Fat: 25g
- Saturated Fat: 4g
- Unsaturated Fat: 18g
- Trans Fat: 0g
- Carbohydrates: 70g
- Fiber: 3g
- Protein: 35g
- Cholesterol: 120mg
Keywords: Japanese Katsu, Chicken Katsu Bowl, Tonkatsu, Japanese comfort food, crispy chicken recipe, breaded chicken, homemade tonkatsu sauce