Pastel Sugar Cookie Sandwiches Recipe
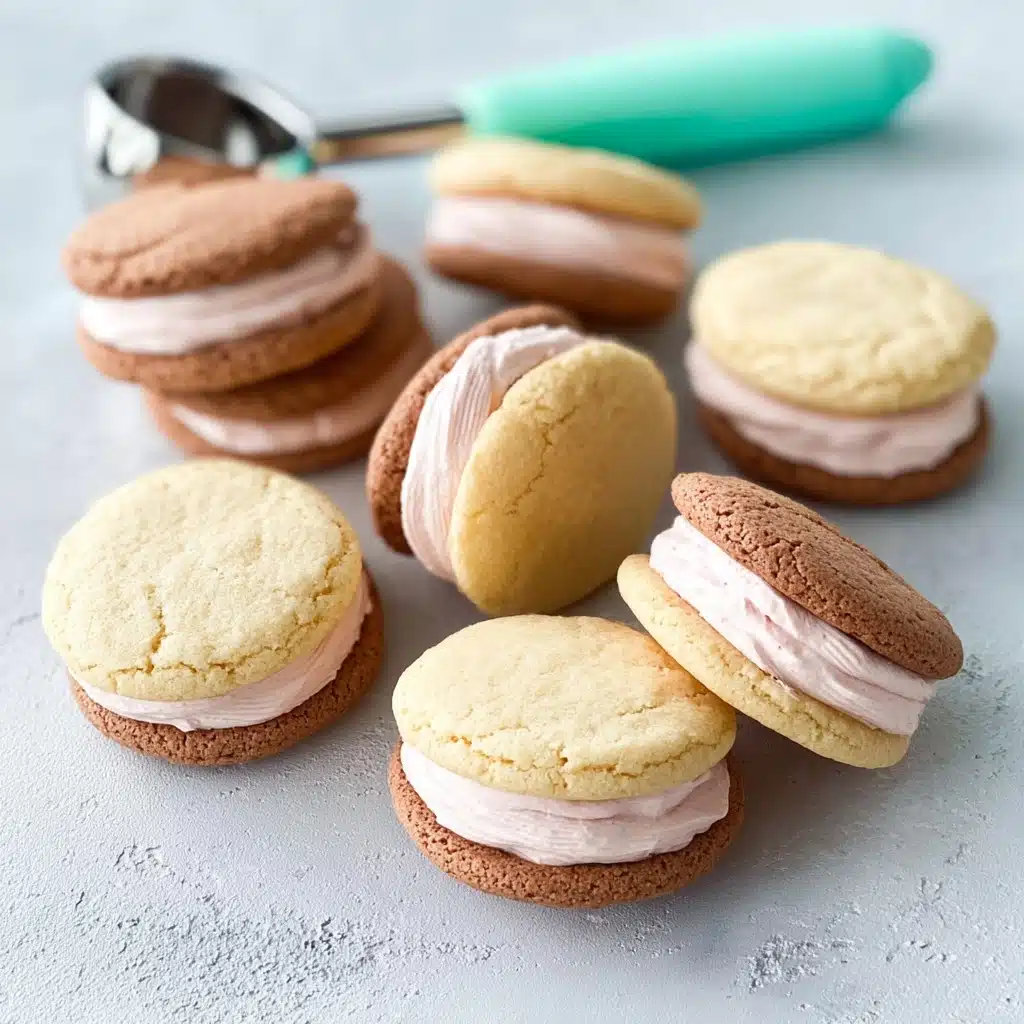
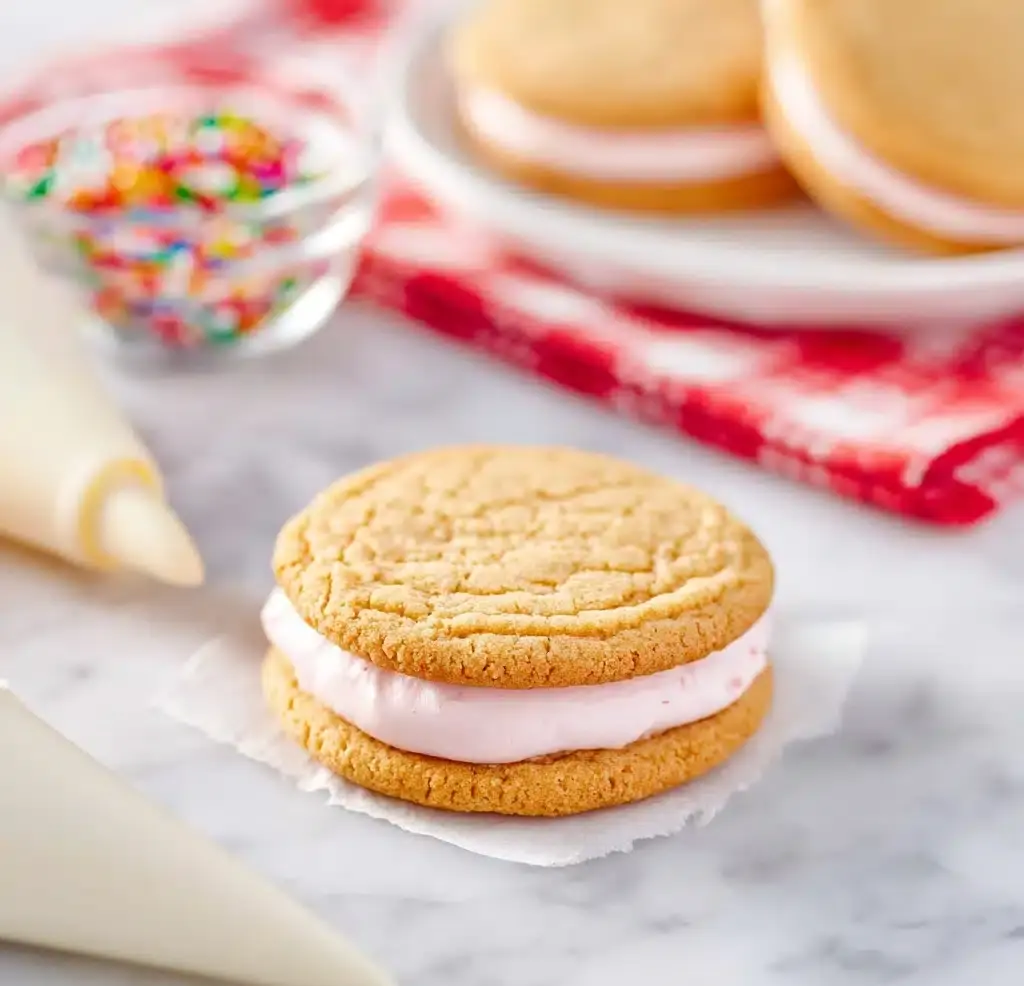
If you are looking for a fun and colorful treat to brighten up any gathering or to simply satisfy your sweet tooth, this Pastel Sugar Cookie Sandwiches Recipe is exactly what you need. These soft, pastel-hued sugar cookies are sandwiched with a rich and creamy vanilla filling that melts in your mouth. From the delicate pastel colors to the perfectly balanced sweetness and texture, this recipe brings an irresistible charm that’s perfect for spring celebrations, birthday parties, or just a delightful homemade snack.
Ingredients You’ll Need
Creating these delightful pastel sugar cookie sandwiches is easier than you might think, and it all starts with simple but essential ingredients that each play a role in delivering that perfect balance of flavor, texture, and color.
- Unsalted butter: Using softened butter is key to achieving that tender, melt-in-your-mouth cookie texture.
- Granulated sugar: Adds sweetness and, when creamed with butter, helps create a fluffy base for the dough.
- Large egg: Provides structure and richness to the cookies.
- Vanilla extract: Infuses the cookies and filling with warm, sweet flavor.
- All-purpose flour: The foundation of the cookies, balancing texture without heaviness.
- Baking soda and baking powder: Work together to give the cookies a soft rise and slight tenderness.
- Salt: Enhances all the flavors subtly, preventing sweetness from becoming cloying.
- Milk: Adds moisture to keep the dough soft and workable.
- Gel food coloring: Provides vibrant, pastel colors without altering the dough’s consistency.
- Powdered sugar: The base for the creamy vanilla filling, contributing smooth sweetness.
- Heavy cream or milk: Used to adjust the creaminess of the filling.
How to Make Pastel Sugar Cookie Sandwiches Recipe
Step 1: Preheat the Oven
Start by setting your oven to 350°F (175°C). Line a baking sheet with parchment paper to ensure your cookies bake evenly without sticking, making cleanup a breeze.
Step 2: Make the Cookie Dough
In a large bowl, beat together the softened butter and granulated sugar until the mixture becomes light and fluffy—that’s about 2 minutes using an electric mixer. Then, add the egg and vanilla extract, blending everything until fully incorporated. This step is crucial because it forms the creamy, luscious base of your dough.
Step 3: Combine the Dry Ingredients
Whisk together the flour, baking soda, baking powder, and salt in a separate bowl. Gradually add these to your wet ingredients on a low mixer speed. The dough will thicken and become soft but manageable. Add in the milk and mix just until everything comes together beautifully.
Step 4: Color the Dough
Divide your dough into five equal portions. Using gel food coloring, tint each portion into a different pastel shade such as pink, yellow, green, blue, and purple. Knead the coloring gently but thoroughly into the dough until each portion is evenly colored with a lovely pastel hue.
Step 5: Shape and Bake
Using a tablespoon scoop, roll each dough portion into a smooth ball. Place the dough balls on your prepared baking sheet, spaced about 2 inches apart so they have room to spread just a bit. Bake for 8 to 10 minutes until the cookie edges are set and the tops show a delicate cracking without browning. Let them cool on the baking sheet for 5 minutes before transferring them to a wire rack to cool completely.
Step 6: Make the Vanilla Filling
Beat the softened butter in a clean bowl until smooth. Slowly incorporate the powdered sugar, then add the heavy cream (or milk), vanilla extract, and a pinch of salt. Continue to beat until the filling turns into a fluffy, light texture that’s perfect for spreading. Adjust the consistency by adding more cream if it’s too thick or more powdered sugar if it’s too thin—flexibility here is your friend!
Step 7: Assemble the Cookie Sandwiches
Once your cookies are totally cool, pair them by size. Spread a generous amount of the vanilla filling on the flat side of one cookie using a piping bag or spoon, then top it with its match and press gently but firmly to spread the filling evenly for that perfect sandwich.
Step 8: Set Before Serving
Allow your cookie sandwiches to rest for about 10 minutes. This helps the filling firm up slightly so when you bite in, everything holds together perfectly while still delivering that creamy dreaminess.
How to Serve Pastel Sugar Cookie Sandwiches Recipe
Garnishes
Enhance these beauties by sprinkling a light dusting of edible glitter or colored sugar crystals over the vanilla filling edge before sandwiching. Fresh edible flowers or a tiny drizzle of white chocolate can also add an elegant touch to elevate the presentation.
Side Dishes
These pastel sweets pair wonderfully with a light cup of tea or a glass of chilled milk. For parties, serve alongside fresh fruit or a bright fruit punch, creating a vibrant spread full of color and freshness that complements the sugar cookie sandwiches.
Creative Ways to Present
Arrange the sandwich cookies on a multi-tiered cake stand to create a festive centerpiece. Alternatively, wrap each cookie sandwich individually in cellophane tied with a pastel ribbon to make charming party favors or gifts that guests will adore.
Make Ahead and Storage
Storing Leftovers
Keep any leftover cookie sandwiches in an airtight container at room temperature for up to 3 days. This helps maintain their softness and keeps the filling deliciously fresh.
Freezing
You can freeze the cookie sandwiches by placing them in a single layer on a baking sheet to flash freeze. Then transfer to a sealed freezer bag or container. They will stay great for up to 2 months. Thaw overnight in the fridge before serving to preserve their lovely texture.
Reheating
Since these cookie sandwiches are best served cool or at room temperature, avoid microwaving, which could soften the filling too much. If desired, briefly unwrap and let them sit out for 10 to 15 minutes to take the chill off after refrigeration or thawing.
FAQs
Can I use regular food coloring instead of gel food coloring?
Gel food coloring is preferred because it provides vibrant colors without altering the dough’s consistency. Regular liquid food coloring could make the dough too wet and affect the texture, so it’s best to stick with gels for this recipe.
What can I substitute if I don’t have heavy cream for the filling?
You can use whole milk as a substitute, but the filling may be slightly less rich. If you want a thicker filling, consider using cream cheese as an alternative for a tangier frosting twist.
Can I make these cookies vegan or dairy-free?
With some ingredient swaps—such as using vegan butter, plant-based milk, and egg replacers—these cookies can be adapted for vegan diets, though the texture and flavor might differ slightly. Experimentation is key to getting the perfect balance!
How do I make sure the cookies bake evenly?
Make sure your dough balls are uniform in size and spaced adequately on the baking sheet. Also, avoid overbaking by checking for set edges and slightly cracked tops rather than browning.
Can I use different flavors for the filling?
Absolutely! While vanilla is classic and complements the pastel colors perfectly, you can mix it up with lemon zest, almond extract, or even a touch of peppermint to create seasonal or personalized flavors.
Final Thoughts
These Pastel Sugar Cookie Sandwiches Recipe is a delightful way to bring a burst of color and sweetness to any occasion. Soft pastel cookies paired with creamy vanilla filling are simply irresistible, and once you make them, they’ll quickly become one of your favorite treats to share with friends and family. Don’t hesitate to give this recipe a try—you’re going to love how joyful and delicious these cookie sandwiches turn out!
PrintPastel Sugar Cookie Sandwiches Recipe
These pastel sugar cookie sandwiches feature soft, colorful sugar cookies filled with a creamy vanilla buttercream. The cookies are lightly crisp on the outside with a tender crumb inside, making them perfect for spring celebrations or anytime you want a charming, sweet treat.
- Prep Time: 20 minutes
- Cook Time: 10 minutes
- Total Time: 40 minutes
- Yield: 24 sandwiches (48 cookies) 1x
- Category: Dessert
- Method: Baking
- Cuisine: American
- Diet: Vegetarian
Ingredients
For the Sugar Cookies:
- 1 cup unsalted butter, softened
- 1 ½ cups granulated sugar
- 1 large egg
- 2 teaspoons vanilla extract
- 2 ¾ cups all-purpose flour
- 1 teaspoon baking soda
- ½ teaspoon baking powder
- ½ teaspoon salt
- 2 tablespoons milk
- Gel food coloring (pink, yellow, green, blue, and purple)
For the Vanilla Filling:
- ½ cup unsalted butter, softened
- 2 cups powdered sugar
- 2 tablespoons heavy cream or milk
- 1 teaspoon vanilla extract
- Pinch of salt
Instructions
- Preheat the Oven: Set your oven to 350°F (175°C) and line a baking sheet with parchment paper to prevent sticking and ensure even baking.
- Make the Cookie Dough: In a large bowl, beat together the softened butter and granulated sugar until the mixture is light and fluffy, about 2 minutes. Then add the egg and vanilla extract, mixing thoroughly until fully combined.
- Combine the Dry Ingredients: In a separate bowl, whisk the all-purpose flour, baking soda, baking powder, and salt together. Gradually add these dry ingredients to the wet ingredients while mixing on low speed. The dough will be thick but soft. Add the milk and mix until just combined.
- Color the Dough: Divide the dough evenly into five portions. Add gel food coloring to each portion to create pastel shades of pink, yellow, green, blue, and purple. Knead the color into each dough portion until uniformly distributed.
- Shape and Bake: Scoop approximately 1 tablespoon of dough and roll into smooth balls. Place the dough balls on the prepared baking sheet spaced about 2 inches apart. Bake for 8-10 minutes until the edges are set and the tops appear slightly cracked but not browned. Cool on the baking sheet for 5 minutes, then transfer to a wire rack to cool completely.
- Make the Vanilla Filling: In a mixing bowl, beat the softened butter until smooth. Gradually add the powdered sugar, then beat in the heavy cream (or milk), vanilla extract, and pinch of salt. Continue to beat until the mixture is fluffy and spreadable. Adjust texture by adding cream if too thick or powdered sugar if too thin.
- Assemble the Cookie Sandwiches: Once cookies are fully cooled, pair them by similar size. Using a piping bag or spoon, spread a generous amount of filling onto the flat side of one cookie. Top with the second cookie and gently press to distribute the filling evenly.
- Set Before Serving: Let the assembled cookie sandwiches rest for about 10 minutes to allow the filling to firm up slightly for optimal texture.
Notes
- For best results, use gel food coloring as it won’t affect the dough consistency like liquid colors.
- You can substitute milk with heavy cream for richer cookie dough.
- The filling can be made dairy-free by using vegan butter and plant-based milk.
- Store the cookie sandwiches in an airtight container at room temperature for up to 3 days or refrigerated for up to a week.
- Allow cookies to cool completely before assembling to prevent melting the filling.
Nutrition
- Serving Size: 1 cookie sandwich (approx. 50g)
- Calories: 200
- Sugar: 18g
- Sodium: 85mg
- Fat: 9g
- Saturated Fat: 5g
- Unsaturated Fat: 3g
- Trans Fat: 0g
- Carbohydrates: 28g
- Fiber: 0.5g
- Protein: 2g
- Cholesterol: 25mg
Keywords: sugar cookie sandwiches, pastel sugar cookies, vanilla buttercream filling, colorful cookies, spring cookies, dessert sandwiches


