Easy Brazilian Cheese Bread Recipe
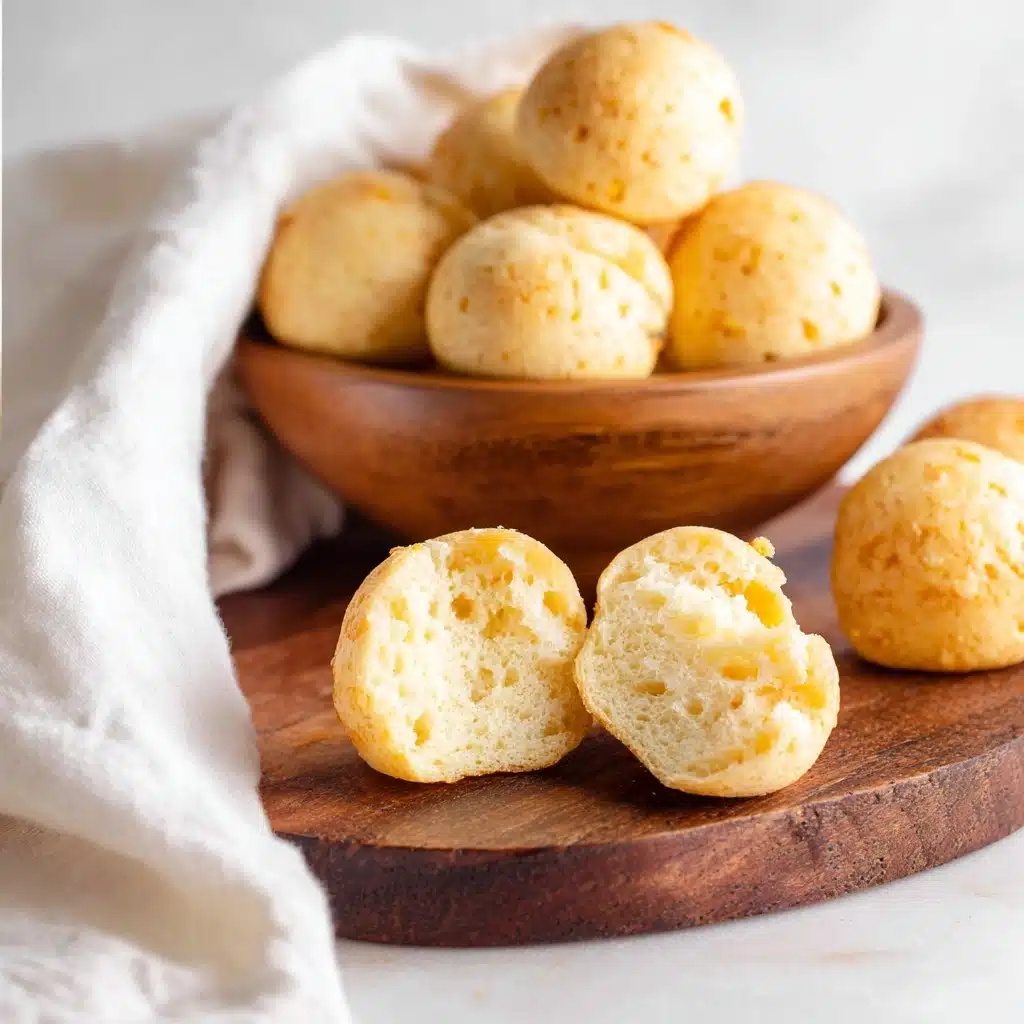
If you’ve never tried Easy Brazilian Cheese Bread, get ready for a delightful surprise that’s irresistibly cheesy, wonderfully chewy, and surprisingly simple to make. This beloved Brazilian snack, also known as pão de queijo, combines a handful of everyday ingredients with tapioca flour to create these bite-sized, golden puffs that melt in your mouth. Whether you’re serving them as a comforting snack or alongside your favorite meal, this recipe will quickly become a cherished favorite for its ease and unbeatable flavor.

Ingredients You’ll Need
This recipe is all about simplicity and the magic that happens when a few well-chosen ingredients come together. Each one plays a crucial role in delivering the perfect balance of texture, flavor, and aroma that makes Easy Brazilian Cheese Bread so unforgettable.
- 1 large egg, room temperature: Acts as a binder and adds richness to the dough.
- 1/3 cup extra virgin olive oil: Provides moisture and a subtle fruity note that complements the cheese.
- 2/3 cup milk: Brings creaminess and helps to hydrate the tapioca flour perfectly.
- 1 1/2 cups (170 g) tapioca flour: The star ingredient that gives the bread its signature chewy texture and gluten-free appeal.
- 1/2 cup (66 g) packed grated or crumbled cheese: Use your favorite cheese for flavor—Parmesan, mozzarella, or a local cheese works beautifully.
- 1 teaspoon salt: Enhances the taste and balances the richness; feel free to adjust to your preference.
How to Make Easy Brazilian Cheese Bread
Step 1: Preheat and Prepare Your Pan
Start by preheating your oven to 400°F, ensuring it’s nice and hot for that perfect rise and golden crust. Grease a non-stick mini muffin tin lightly with olive oil to prevent sticking and help the cheese bread crisp up on the outside while staying tender inside.
Step 2: Blend the Ingredients
Pop the egg, olive oil, milk, tapioca flour, cheese, and salt into a blender. Pulse until everything comes together into a smooth batter. You might need to pause and scrape down the sides with a spatula to make sure every bit is incorporated evenly—the resulting texture should be silky and slightly thick.
Step 3: Chill (Optional) and Prepare to Bake
If you want to make these ahead, simply cover the batter and refrigerate for up to a week. When ready to bake, bring the batter back to room temperature and give it a quick whisk to revive its silky consistency. This step makes your Easy Brazilian Cheese Bread even more convenient to enjoy anytime.
Step 4: Fill the Mini Muffin Tin
Carefully pour or spoon the batter into the prepared mini muffin tin, filling each cup almost to the top but leaving a tiny gap (about 1/8 inch) to allow the bread to puff up without overflowing. This ensures those perfectly round, bite-sized puffs you’re after.
Step 5: Bake Until Puffy and Golden
Bake the batter at 400°F for 15 to 20 minutes. Keep an eye on them until they blossom into puffed, lightly browned gems with a slightly crisp exterior. Once baked, transfer them to a rack and let the Easy Brazilian Cheese Bread cool for a few minutes—this resting time helps them set just right.
How to Serve Easy Brazilian Cheese Bread
Garnishes
While these cheese breads are delicious on their own, you can elevate them by sprinkling a touch of fresh herbs like finely chopped parsley or oregano right after baking. A small dab of garlic butter or a drizzle of honey on the side adds a fantastic flavor contrast that keeps your guests coming back for more.
Side Dishes
Easy Brazilian Cheese Bread pairs wonderfully with a variety of dishes. Serve them alongside a hot bowl of Brazilian black bean stew (feijoada), fresh salads, or even a cup of rich coffee or tea for an authentic snack experience. They also complement grilled meats brilliantly, making them perfect for any meal.
Creative Ways to Present
Turn these golden bites into party stars by arranging them in a basket lined with a colorful cloth, or stack them in a pyramid shape on a platter to showcase their fluffiness. For a playful twist, stuff them with small pieces of cooked sausage or sautéed mushrooms before baking for a tantalizing surprise inside.
Make Ahead and Storage
Storing Leftovers
If you find yourself with extras, no worries! Store leftover Easy Brazilian Cheese Bread in an airtight container at room temperature for one day or in the fridge for up to a week. This helps keep their chewy softness intact while preventing them from drying out.
Freezing
To keep your Easy Brazilian Cheese Bread on hand longer, freeze them for up to a month. Place them in a freezer-safe container or bag to maintain freshness. When you’re ready to enjoy, just take out the desired amount and prepare to warm them back up.
Reheating
Reheat your cheese breads by microwaving for a few seconds to regain softness, or use a toaster oven or regular oven for 1 to 2 minutes to restore crisp outside and chewy inside perfection. A low oven will thaw frozen puffs deliciously without compromising their texture.
FAQs
Can I use regular flour instead of tapioca flour?
Tapioca flour is the key to achieving that classic chewy texture in Brazilian cheese bread. Using regular wheat flour will change the texture completely and won’t give you the characteristic stretch and bounce of the original recipe.
What types of cheese work best for this recipe?
Traditional recipes often use Minas cheese if you can find it, but Parmesan, mozzarella, or even a sharp cheddar can be delicious. Choose a cheese you love that melts well and provides a nice savory kick.
Is this recipe gluten-free?
Yes! Tapioca flour is naturally gluten-free, making this Easy Brazilian Cheese Bread a great option for those avoiding gluten, as long as you use gluten-free cheese and other ingredients.
Can I make this dough ahead of time?
Absolutely! You can prepare the batter and refrigerate it for up to one week. Just be sure to bring it back to room temperature before baking and give it a quick whisk to restore its smooth texture.
Why is my cheese bread not puffing up?
If your cheese bread doesn’t puff, it might be due to oven temperature being too low or batter consistency being off. Make sure your oven is fully preheated to 400°F and that you’re using fresh tapioca flour and proper measurements of liquids and eggs for the best rise.
Final Thoughts
Making Easy Brazilian Cheese Bread is one of those joyful kitchen moments where simple ingredients create something truly special. With its chewy texture, cheesy goodness, and warm aroma, this recipe invites you to share a little taste of Brazil anytime you want. So go ahead, gather your ingredients, and treat yourself to this delightful, easy-to-make favorite that’s sure to impress everyone at your table.
PrintEasy Brazilian Cheese Bread Recipe
Easy Brazilian Cheese Bread, also known as Pão de Queijo, is a delightful gluten-free snack made with tapioca flour and cheese, resulting in chewy, cheesy mini muffins that are perfect for breakfast or as a savory snack. This simple recipe uses a blender for quick batter preparation and bakes in a mini muffin tin for cute, perfectly portioned bites.
- Prep Time: 10 minutes
- Cook Time: 15-20 minutes
- Total Time: 25-30 minutes
- Yield: Makes about 24 mini cheese breads 1x
- Category: Snack, Breakfast
- Method: Baking
- Cuisine: Brazilian
- Diet: Gluten Free
Ingredients
Wet Ingredients
- 1 large egg, room temperature
- 1/3 cup extra virgin olive oil, plus more for greasing the pan
- 2/3 cup milk
Dry Ingredients
- 1 1/2 cups (170 g) tapioca flour
- 1/2 cup (66 g) packed grated or crumbled cheese (your preference)
- 1 teaspoon salt (or more to taste)
Instructions
- Preheat the oven and prepare the pan: Preheat the oven to 400°F (200°C). Lightly grease a non-stick mini muffin tin with extra virgin olive oil to prevent sticking.
- Blend the ingredients: Place the egg, olive oil, milk, tapioca flour, cheese, and salt in a blender. Pulse until the mixture is smooth, stopping occasionally to scrape down the sides with a spatula to ensure thorough blending.
- Optional chilling: You can cover the batter and refrigerate it for up to 1 week. Before baking, bring the batter to room temperature and whisk it lightly to recombine.
- Fill the muffin tin: Pour the batter into the prepared mini muffin tin wells, filling each almost to the top but leaving about 1/8 inch of space.
- Bake: Bake in the preheated oven at 400°F (200°C) for 15-20 minutes until the breads are puffy and golden brown. Remove from the oven and let them cool on a rack for a few minutes.
- Serve: Enjoy the cheese breads warm or at room temperature for the best texture and flavor. They are chewy and reminiscent of Japanese mochi.
- Storage and reheating: Store leftovers in an airtight container at room temperature for up to 1 day or refrigerate for up to 1 week. Reheat briefly in the microwave or toaster oven before serving. They can also be frozen for up to 1 month and reheated in a low oven or toaster oven until thawed and crisp.
Notes
- Tapioca flour is essential for the characteristic chewy texture; do not substitute regular flour.
- You can use any cheese you prefer, but traditional Brazilian cheese breads often use Minas cheese or Parmesan.
- For a dairy-free version, substitute milk and cheese with suitable alternatives, though texture will vary.
- To ensure even baking, do not overfill the muffin wells and maintain the 1/8 inch space at the top.
- The batter can be made ahead and stored in the refrigerator for convenience.
- Olive oil adds flavor, but you can substitute with a neutral oil if preferred.
Nutrition
- Serving Size: 2 mini cheese breads (approx. 40 g)
- Calories: 140 kcal
- Sugar: 1 g
- Sodium: 200 mg
- Fat: 9 g
- Saturated Fat: 2.5 g
- Unsaturated Fat: 6 g
- Trans Fat: 0 g
- Carbohydrates: 12 g
- Fiber: 0.5 g
- Protein: 3 g
- Cholesterol: 40 mg
Keywords: Brazilian cheese bread, Pão de Queijo, tapioca flour bread, gluten free snack, cheesy mini muffins


