Coffee-infused Chocolate Brownies with Mocha Frosting Recipe
Introduction
These Coffee Brownies combine rich chocolate and bold espresso flavors for a decadent treat. Soft, fudgy, and topped with creamy coffee frosting and a glossy chocolate drizzle, they’re perfect for any coffee lover’s dessert cravings.

Ingredients
- 1/2 cup unsalted butter, melted
- 1/4 cup dark cocoa powder
- 1 cup granulated sugar
- 2 tablespoons instant espresso powder
- 2 large eggs
- 1 teaspoon vanilla extract
- 1/2 teaspoon table salt
- 1/4 teaspoon baking powder
- 3/4 cup all purpose flour
- 3 tablespoons heavy whipping cream (for frosting)
- 1 1/2 teaspoons instant coffee granules
- 1/4 cup unsalted butter, softened
- 1/8 teaspoon salt
- 1 3/4 cups powdered sugar
- 1/2 cup dark chocolate chips
- 2 tablespoons heavy whipping cream (for chocolate drizzle)
Instructions
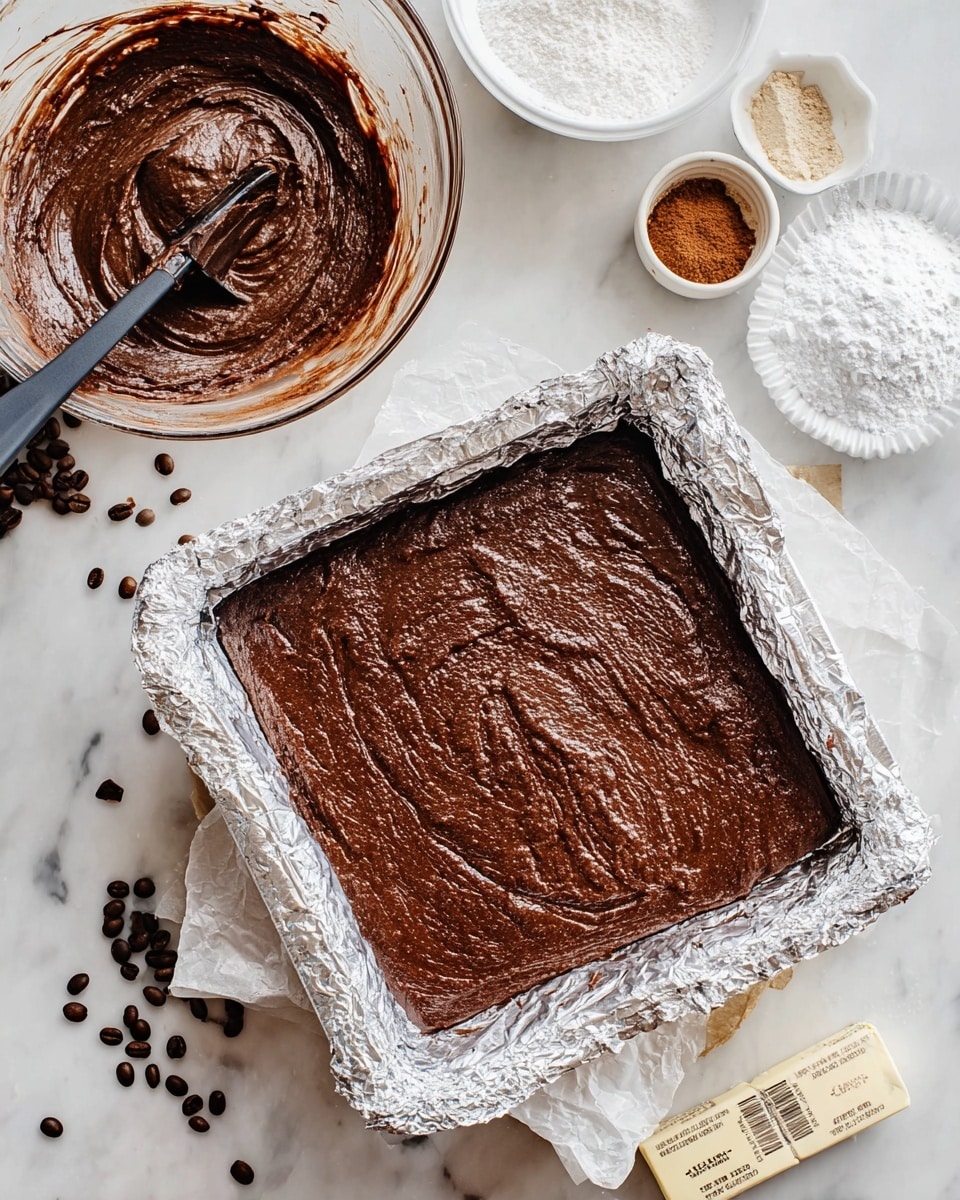
- Step 1: Preheat your oven to 350°F (175°C). Line an 8×8 inch pan with foil and spray it with nonstick baking spray.
- Step 2: Whisk together the melted butter and cocoa powder until smooth.
- Step 3: In a separate bowl, beat the sugar, eggs, espresso powder, and vanilla extract until the mixture is light and fluffy. Stir in the chocolate butter mixture.
- Step 4: Combine the salt, baking powder, and flour. Gradually stir these dry ingredients into the wet mixture.
- Step 5: Spread the batter evenly in the prepared pan. Bake for 25-28 minutes, or until a toothpick inserted in the center comes out slightly sticky. Remove from oven and let cool completely.
- Step 6: For the frosting, mix the heavy whipping cream and instant coffee granules until the coffee is dissolved.
- Step 7: Beat the softened butter and salt until creamy. Slowly add the powdered sugar and coffee cream mixture while continuing to beat.
- Step 8: Once combined, beat on high speed for 1 minute until the frosting is light and fluffy. Spread this frosting evenly over the cooled brownies.
- Step 9: Place the dark chocolate chips and heavy cream for the drizzle in a microwave-safe bowl. Heat for 30 seconds, then stir until smooth. If needed, heat an additional 15 seconds and stir again.
- Step 10: Spread the melted chocolate evenly over the frosting. Allow it to set before cutting the brownies into 16 squares.
Tips & Variations
- Use high-quality cocoa powder and espresso for the richest flavor.
- Add chopped nuts or chocolate chunks into the batter for extra texture.
- For a stronger coffee taste, increase the instant coffee granules in the frosting.
- Let the brownies cool completely before frosting for a smooth finish.
Storage
Store the brownies in an airtight container at room temperature for up to 3 days or in the refrigerator for up to one week. If refrigerated, allow them to come to room temperature before serving. Leftovers can also be frozen for up to 2 months; thaw overnight in the fridge.
How to Serve
Serve this delicious recipe with your favorite sides.
FAQs
Can I use brewed coffee instead of instant coffee granules?
Instant coffee granules provide concentrated flavor without adding extra moisture, so it’s best to use them as directed. Using brewed coffee may alter the frosting’s consistency.
How do I know when the brownies are done baking?
The brownies are ready when a toothpick inserted in the center comes out with a few moist crumbs but is not wet with batter. This ensures a fudgy texture without overbaking.
PrintCoffee-infused Chocolate Brownies with Mocha Frosting Recipe
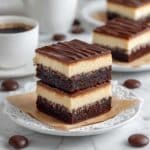
These Coffee Brownies combine the rich, fudgy texture of classic brownies with a bold coffee flavor. Infused with espresso powder and topped with a creamy coffee frosting and a glossy chocolate ganache, they offer a perfect balance of sweetness and deep mocha notes. Ideal for coffee lovers looking for a decadent dessert.
- Prep Time: 15 minutes
- Cook Time: 28 minutes
- Total Time: 43 minutes
- Yield: 16 squares 1x
- Category: Dessert
- Method: Baking
- Cuisine: American
Ingredients
Brownie Batter
- 1/2 cup unsalted butter, melted
- 1/4 cup dark cocoa powder
- 1 cup granulated sugar
- 2 tablespoons instant espresso powder
- 2 large eggs
- 1 teaspoon vanilla extract
- 1/2 teaspoon table salt
- 1/4 teaspoon baking powder
- 3/4 cup all-purpose flour
Coffee Frosting
- 3 tablespoons heavy whipping cream
- 1 1/2 teaspoons instant coffee granules
- 1/4 cup unsalted butter, softened
- 1/8 teaspoon salt
- 1 3/4 cups powdered sugar
Chocolate Ganache Topping
- 1/2 cup dark chocolate chips
- 2 tablespoons heavy whipping cream
Instructions
- Preheat and Prepare Pan: Preheat the oven to 350 degrees Fahrenheit. Line an 8×8 inch pan with foil and spray it with nonstick baking spray to ensure easy removal of the brownies.
- Mix Butter and Cocoa: Whisk together the melted butter and dark cocoa powder until smooth and well combined.
- Beat Sugar and Eggs: In a separate bowl, beat the granulated sugar, eggs, instant espresso powder, and vanilla extract until the mixture is light and fluffy for a tender brownie texture.
- Combine Mixtures: Add the chocolate butter mixture to the sugar and egg mixture and mix again until fully incorporated.
- Add Dry Ingredients: Stir together the salt, baking powder, and flour. Slowly fold the dry ingredients into the wet mixture, blending gently to avoid overmixing.
- Bake Brownies: Pour the batter evenly into the prepared pan. Bake for 25-28 minutes, or until a toothpick inserted in the center comes out slightly sticky. Remove from the oven and allow to cool completely.
- Prepare Coffee Cream: Stir together the heavy whipping cream and instant coffee granules until the coffee is dissolved.
- Make the Frosting: Beat the softened butter and salt until creamy. Gradually add the powdered sugar and the coffee cream mixture while beating. Once combined, beat on high speed for 1 minute until light and fluffy.
- Frost the Brownies: Spread the coffee frosting evenly over the cooled brownies.
- Make Chocolate Ganache: Place the dark chocolate chips and heavy whipping cream in a microwave-safe bowl. Heat for 30 seconds, then stir until melted and smooth. If necessary, heat an additional 15 seconds and stir again.
- Top and Set: Spread the melted chocolate ganache over the coffee frosting layer. Allow the chocolate to set before cutting the brownies into 16 squares.
Notes
- Do not overbake the brownies; they should be slightly sticky in the center for a fudgy texture.
- Allow the brownies to cool completely before frosting to prevent melting the frosting.
- For stronger coffee flavor, increase the espresso powder slightly in the batter.
- Use high-quality dark cocoa powder and chocolate chips for the best richness.
- Ensure the coffee granules are dissolved fully in the cream to avoid grainy frosting.
Keywords: Coffee Brownies, espresso brownies, chocolate coffee dessert, fudgy brownies, mocha brownies